Do not panic, that you do not need to be an expert in DIY or a real 'handyman' to make your own boards. In this article we tell you how you can manage to get it in a simple way.
By my way of understanding hunting activity I could not consider myself a good hunter if I do not know how to 'fix' the piece hunted, if I do not know how to cook it to take advantage of its meat or if I do not worry about raising it, to give several examples. Because being a hunter isn't just being a good shooter. You need to know something else.
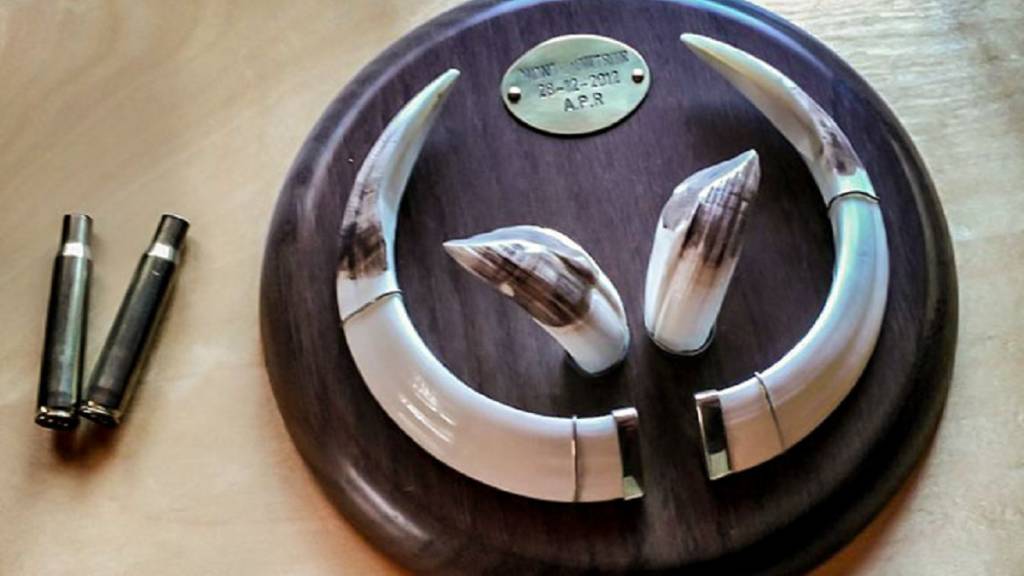
I feel like I'm hunting not just the days when I wear the rifle or the shotgun; I also do those in which I approach the coto to fill the drinking fountains of the partridges, to see the steps of the pigeons, to check the feeder of the guarros ... and also when I do my little pinitos as a taxidermist. In this article we will tell you how to prepare in a basic way your wild boar trophies. In ten simple steps we have prepared a table with the knives of a male wild boar and a female, using a aperada board –of those used for the deer fronts–.
At first glance it may seem like a complex task, but with a little skill and practice you will learn to keep your own trophies. Something that is also part of the ritual of hunting. In the meantime, I will try to learn how to make... a good stew!
What you need:
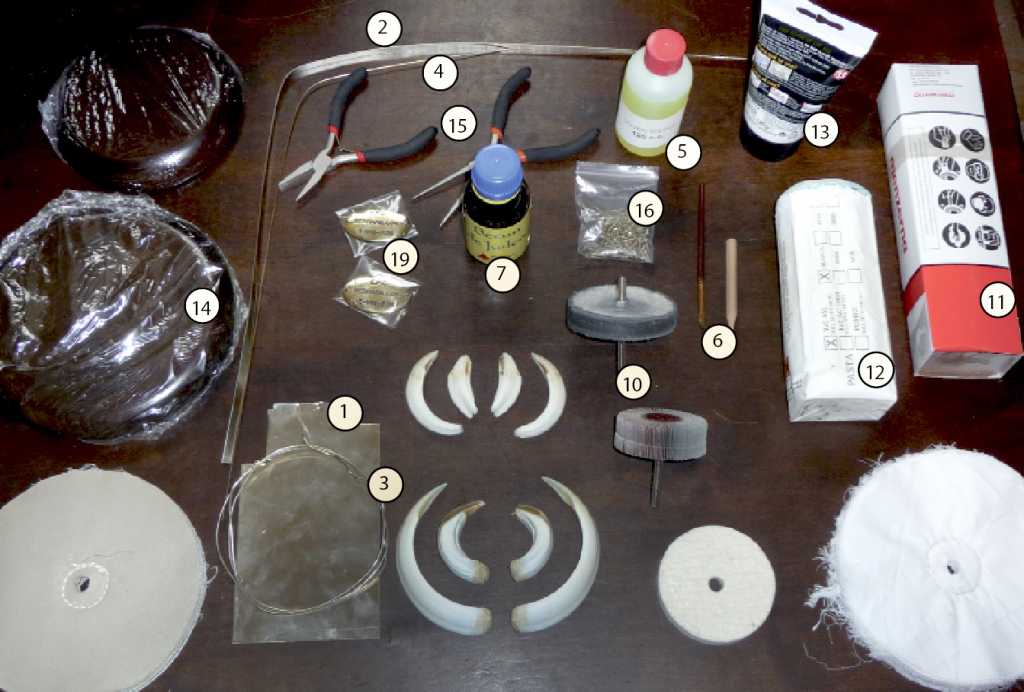
1. Alpaca sheet four tenths thick.
2. Strip of alpaca seven millimeters wide and four tenths thick.
3. Round alpaca thread.
4. Silver rod for welding alpaca.
5. Stripper for welding.
6. Brush.
7. Bitumen of Judea.
8. Aguarrás.
9. Drill with different accessories such as bits, stem to attach discs of fabric or felt and sandpaper of grain number 80 adaptable to it.
10. Two discs of fabric or felt.
11. Pasta to polish alpaca.
12. White paste to polish tusks or bone.
13. Ultra-heavy glue of those used to glue wood, metal, stone and other materials.
14. Table of the appropriate dimensions to our trophy.
15. Diverse material such as pliers, screwdriver, tongs, scissors to cut sheet metal...
16. Small screws.
17. Torch.
18. Polyester resin or commercial filling for wild boar tusks.
19. Brass plates engraved with our initials, name of the farm and date of capture.
1. Take out the fangs
We separate the jeta and front of the snout of the hunted wild boar from the rest of the body making a cut behind the third premolar – third tooth behind the knives – with the help of a saw arch. Once cut and devoid of the tongue and all the rest of meat or skin, we proceed to cook this part in a pot with water for at least an hour and a half and then remove the tusks and grinders with ease. These will come out pulling them and the knives we extract them backwards, pushing them inwards and extracting them through the back of the jaw, just through the hole that has remained in it after the cut with the saw. Then we clean them with soap and water, including their interior, so that there is not a single remaining meat.
2. Blanquéalos
To whiten them we wrap fangs and grinders in cotton and soak it with oxygenated water of 110 volumes for an hour. We can also use the conventional but keeping them in this solution between 8 and 10 hours.
3. Fill them so they don't crack
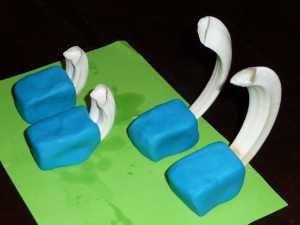
So that they do not crack you have to fill the knives with bone-colored liquid polyester resin or with tusk filler –you will find it in armories or shops of material for taxidermy–. To do this we puncture the pieces in porexpan or hold them with plasticine so that the hole is upwards.
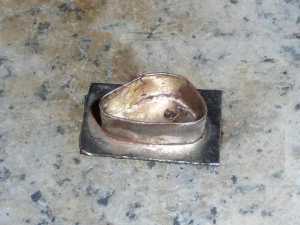
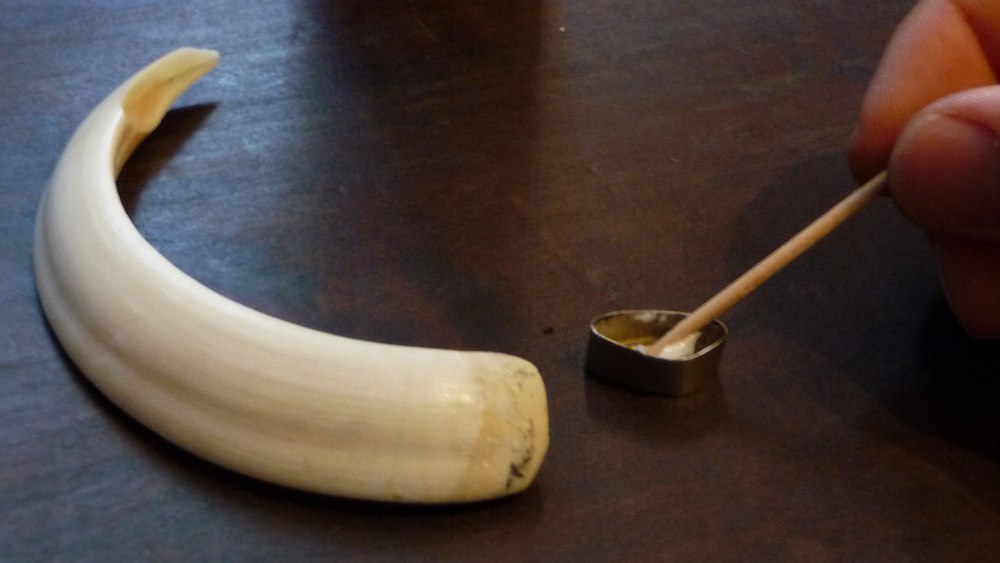
4. Manufacture the caps
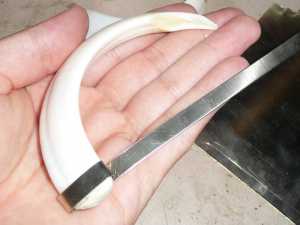
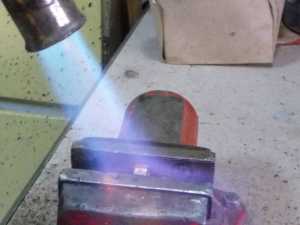
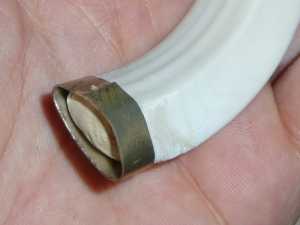
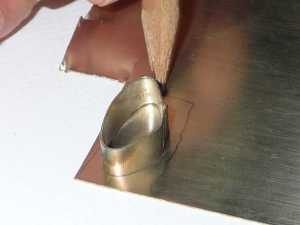
Once the filling is dried, we build the bushings with a seven-millimeter alpaca strip. We surround each of the tusks with it and cut them as they are based (4.1). We solder the ring formed with the help of a torch and a silver rod (4.2) as follows: with a typical workshop screw we keep the ring together, apply paint stripper for welding and heat with the torch. Once the stripper evaporates we pull the welding rod until it releases a small drop. This will expand on the surface on which we apply the stripper if we continue to apply heat with the torch... and will already be welded (4.3).
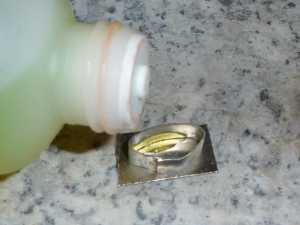
Cut a small base of alpaca (4.4) and put the welded ring on top of it. Apply stripper on the inside (4.5) and introduce a piece of five millimeter welding rod inside. Applying heat with the torch, and after evaporating the stripper, the piece of rod melts and the cap is welded (4.6). We will manufacture one for each tooth.
5. Clean them up
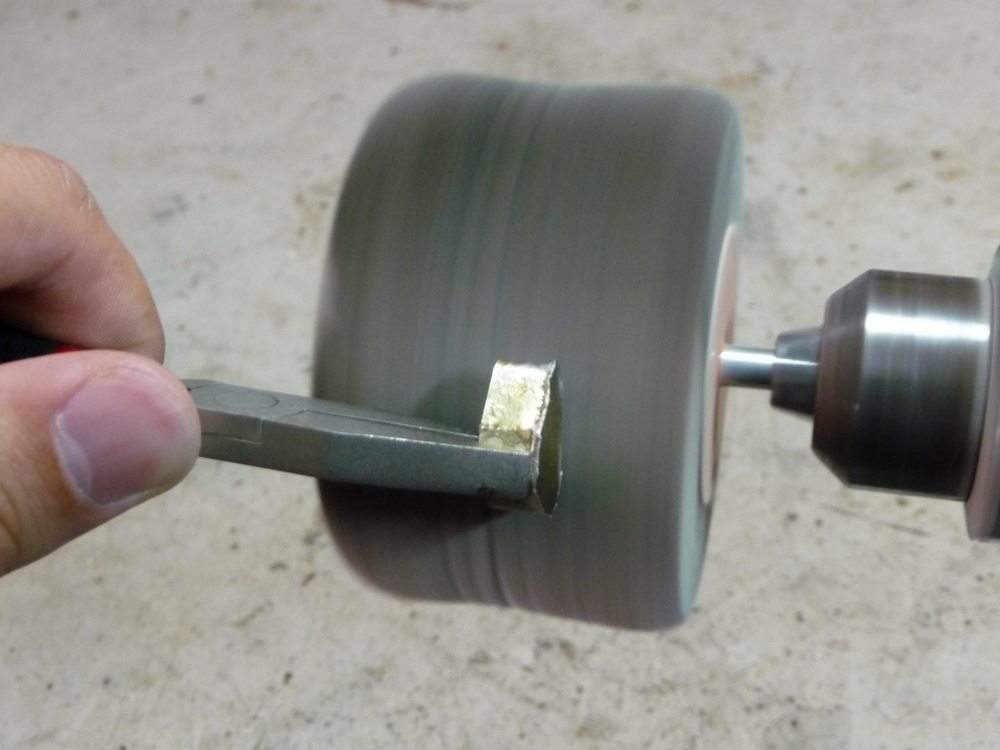
Cut the leftover alpaca around each cap with a scissors to cut sheet metal. With a grain sandpaper of 80 for drills we sand all the bushings until they are completely smooth.
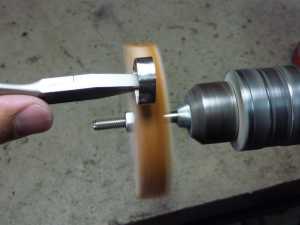
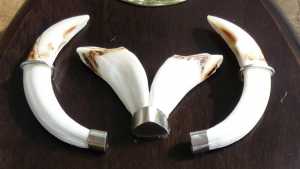
6. Put them
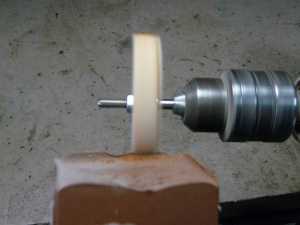
With the help of the drill provided with a felt or fabric disc we polish the bushings: while turning, we support the disc in the special paste to polish alpaca (6.1). Then we put the bushings to the disc (6.1), thus polishing its entire surface, and clean them with cotton and alcohol. They will now have a shine similar to that of silver.
7. Finish the Fangs
Glue the bushings to the knives with ultra-hard glue. With white polish paste and a felt disc we polish the surface of all the tusks then cleaning them with cotton and a little alcohol.

8. Put the veneer on

We placed the brass veneer – which we will have ordered in a trophy shop – at the top of the table.
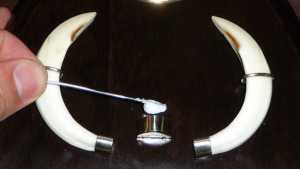
9. Look at them in the table

With alpaca thread we build some hooks to be able to fix the knives to the table (9.1). We present them and mark the drills we need to do. Then we fix them in the desired position with the help of glue. Making a hole with the drill in the bushings of the grinders we fix them to the table with a small screw (9.2). With the ultra-fast glue we glue the grinders to the cap (9.3) placed with the screw, so that they are supported to the table by its base –this way of placing them is called 'a la riojana' (9.4)-.

10. The final touch
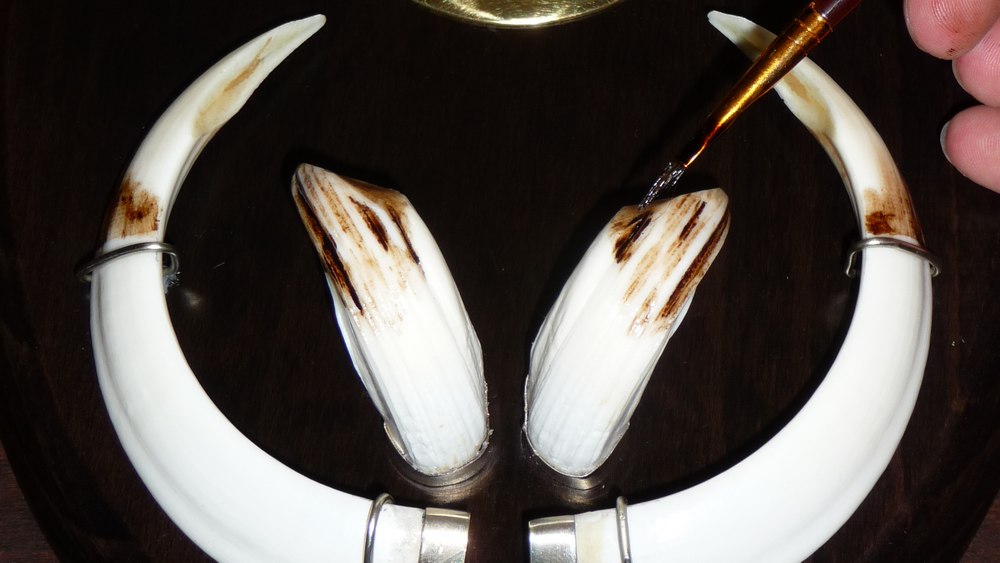
Finally, we restore with judea bitumen diluted in aguarrás the drawings of the tusks before having introduced them in oxygenated water. If you prefer them almost totally white forget about this step.
Upshot

The article How to make a table with the tusks of a wild boar appears first in Jara and Sedal Magazine.